Dendrobaena's can also be used in brackish waters with dabs, mullet and other estuary fish having been caught using this fishing worm.
Dendrobaena worms are one of the most popular earth worms used in fishing. It is a particularly tough and wriggly worm which can survive in cold water for long periods, remaining tasty and tempting to fish.
Make Your Own Wormery

As the wormery worms run out of food they will migrate into the other sections. This allows you to remove the finished compost from the rested section without taking all the composting worms with it.
The advantage of partitioning your wormery is that when a section is getting full you can stop feeding it for 3 or 4 weeks.
By using this website you agree to the
Terms & Conditions of www.fish-uk.com
Copyright © 2007 to present www.fish-uk.com
All rights reserved
Terms & Conditions of www.fish-uk.com
Copyright © 2007 to present www.fish-uk.com
All rights reserved
The sides and bottom were made with 12mm plywood, while the lid and partitions were made with 8mm plywood.
Fishing Worms
The Dendrobaena worm
The Dendrobaena worm
In fresh water the Dendrobaena worm is a favourite of carp, tench, roach, perch and bream. During the summer months the largest fishing worms are very popular for salmon and sea trout fishing.
In order to prevent small rodents from gnawing their way into the wormery it is a good idea to attach some light wire mesh to the underside of the floor of the wormery.
A homemade wormery for breeding worms for fishing bait is fairly easy to build.
Below are some guidelines on how to make a DIY wormery and information on how to look after your worms.
Article courtesy of Bucket of Worms 2008
Bucket of Worms are no longer trading
Bucket of Worms are no longer trading
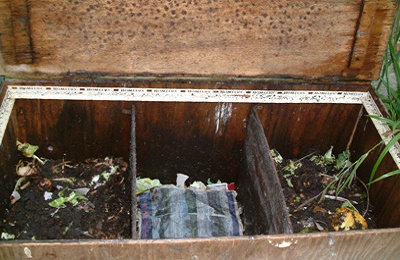
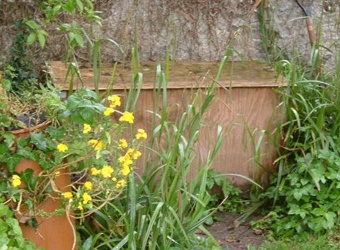
To build a wormery, you could follow the plan of the first wormery we made, pictured, which was simply constructed with untreated plywood, 2 feet high, 2 feet deep and 4 feet wide, with a lid and perforated floor to allow for drainage.
The wormery should ideally be raised off the ground on batons 25 to 50mm high to allow moisture to drain out. Drill plenty 12mm in diameter holes in the floor.
When the wormery was made it was divided into three sections. Each partition had plenty of holes of about 8 to 10mm diameter drilled into them, allowing lateral movement of the worms.
As long as you have enough worms initially, a kilo will be sufficient, they will soon breed up to the correct numbers for their living space. Therefore the more food waste you want to compost the greater the surface area you need.
This helps prevent the worms from crawling out the bottom before they have got stuck into their new supply of food.
Once you have built your wormery you will need a wormery start up pack. This will consist of all you need to establish and maintain your wormery.
If you are placing worms into an empty wormery, line the bottom with 2 or 3 sheets of newspaper.
A basic wormery start up pack usually contains 500g of Worms (approx 450), Worm Food and Coir block for the bedding.
Taking care of your worms
You must place your wormery in a shaded area because Worms will die at high temperatures
You will notice that worms get through more food in the summer when their metabolism increases with the warmth.
The worms need to be able to get back to their "safe medium" and have a chance to breed up to the numbers needed to deal with all your waste food. You will soon see the worms amongst the food waste you have added.
Feeding. Start by adding smaller amounts of food, do not smother the worms for the first 3 months
Once you have your wormery set up, your worms will be happy in the medium provided in the start up kit.
Composting worms like to have some roughage occasionally. Good sources are shredded damp newspaper, crushed egg shells and even a sprinkling of sand to aid their digestion.
If you do feed citrus fruit make sure that its small amounts and you use lime to neutralise the acidity. The smaller you can cut up your scraps the better for the worms.
It is amazing how pieces of potato can sprout in a wormery and some people microwave scraps to prevent this happening. We have found that a worms favourite food type is root vegetables.
Worms need to be fed a balance of food scraps and fibre, about 60/40 split. You can recycle your newspapers, shredded documents and empty egg cartons. Worms love them when torn into narrow strips and small pieces.
f your worm composting bin is looking too wet or is getting a bit smelly, try adding dry cardboard or if very wet add small lumps of coir.
Like humans worms have their likes and dislikes, a major dislike being onions, leeks and garlic. Worms for composting are also not keen on citrus fruit as they do not like the acidity.
The best food for worms is dead organic matter, e.g. vegetables, fruit, paper, cardboard products and coffee grounds. Avoid feeding them dairy products, oils and meat.
Dampen any paper products before feeding to your composting worms and make sure that any paper products fed to your worms are not plastic coated.
Alternatively, if things are drying up, add wet shredded paper or lightly spray water over the wormery surface. It is best to use rain water or any non chlorinated water.
Worms need oxygen to live and work. If you have a non-stacking tray wormery you will need to gently fork through the material in your wormery every 3 to 6 weeks to maintain oxygen flow.
A good way to reduce the acidity of your wormery is to sprinkle lime into it e.g. crushed limestone, or ensure that they get a good supply of crushed egg shells
Composting worms like a PH level between 7 and 8, however your worm composting bin may get too acidic during the composting process.

www.Fish-uk.com
Place 2 or 3 sheets of newspaper or a cut to size plastic sheet, e.g. from an old compost bag, over the compost. This allows the worms to work happily on the surface of the food.